Saturday, January 31, 2009

Fabric Dyeing: Learning Lessons with Practice

As mentioned previously, I'm preparing to be a vendor at our quilt guild show, and my booth will feature hand-dyed fabric...so I'm dyeing, and dyeing, and dyeing.

Two days ago I dyed some fabric with a new "Lime" colored dye and it was less than pleasing to my taste. It wasn't that beautiful bright lime green; it was the color of lime peel, without much depth. Ick. The photo below captures some of that icky green mixed with a little Midnight Blue.


Anyway, today I over-dyed the lime-colored pieces and then dyed some new fabric, mixing the lime dye with other colors. That Lime is no longer my least favorite. Check out these photos and see what happens with a little color mixing...

Lime mixed with Grape (below)


Lime (light mixture) with light Grape


Lime with equal amount of Midnight Blue


Lime with Havana Brown

A little Lime with a lot of Midnight Blue


Humm, not bad!


Thursday, January 29, 2009

String Quilts: What's a String?


If you have no clue what a "string" is in the quilting world, it's a strip of fabric that is not the same width all the way along the strip. A string is tapered (wider at one end and tapering to a narrow end) and can be a tiny, narrow piece or a long, wider piece. The idea is that it does not look like a "strip" of fabric.

I've been dyeing fabric for a couple of weeks, and for each yard I dye, I actually have a 1 yard + 5" piece...that way I can have extra fabric for strings when I trim the ends of the fabric. Here's my setup after trimming yardage.


If a piece is too wide, I will use a rotary cutter to cut it into two tapered string pieces.

Whenever I trim the edge of a piece of fabric to straighten it, I make sure to cut enough off to use as a string. You can even cut up old blocks to use as strings...


Here are some of the strings in my stash. Some of them are a little too much like strips, so I'll trim them into string shapes later.
This is the lovely box of hand-dyed and other strings that I'll use for class kits. Aren't they yummy?


String Quilts


This blog entry is especially for students in my upcoming String Quilt Blocks workshops. Here are some samples of the string quilts I've made.
These next two are miniatures, at about 10" x 11" each.


These two were made for the Quilts of Valor Foundation for injured soldiers.


Sunday, January 25, 2009

Fabric Dyeing Results


Here are some of the results of last night's dyeing and this morning rinsing...


This next one was shibori style with rubberband resists and jar covers. I'd love to do this method again using oranges, yellows and a little green because the circles look like sunflowers.


Fun!

Fabric Dyeing -- What I've learned this week

As I wrote before, the fabrics that I'm dyeing this week (I use the low-water immersion dyeing method) will be for sale, and because of the large volume of dyeing, I've learned some new tricks:

1) I want finished 1 yard (plus 1-2 inch) pieces of fabric to sell, so if I do not use PFD (prepared for dye) fabric I have to prewash my fabric as one large piece then dry it, press it, and cut it down to size. I tried cutting to size before washing, but the several rinses and two washes the fabric goes through in the dye process distort the fabric. Often that one-yard +2" piece is so distorted that I can't get a full yard out of it when it's finished.
2) I need to dye similar colors per session so that the rinsing and final wash can be done in one batch. This way I avoid mixing lights and darks in the washer and we save water. High efficiency washers, by the way, are fine with low-water immersion dyeing.
3) One batch = 16 to 18 yards. I can dye the pieces in a reasonable amount of time and then take a good break. The photo above is one-session worth of dyeing with 2-3 pieces per tub.
4) Gradation dyeing is the way to go. The first piece in the dye will be the darkest, the next piece will be a medium of the same color and the third piece will be light. For all three yards, it takes only 4 tablespoons of dye concentrate. It also helps in the rinsing process because the top two pieces absorb dye that would otherwise have been rinsed away later.
5) Breaks need to be frequent and long to give my body a rest from standing. Even with good foam padding on the garage floor, the cement floor takes a toll on my feet and legs.

6) There are many, many ways to fold and manipulate fabric. Yesterday was the first time I used the above method of rubber banding resist. I collect containers and keep them in a box in the garage, knowing that they will be used in my work at some point. Well, all of those covers came in handy yesterday. Who knows if this will work, but it looks cool.

Have you ever used one of these cement mixing tubs before? They are made of an indestructible black plastic and come in two sizes that I've seen. This one is 25" long x 20" wide x 6" deep, but there are larger ones, and they can be purchased at a home improvement store. This one makes a great fabric dyeing container because the bottom is flat.

When my boys were little my sister worked at Lego, so you know we had thousands of Legos in the house. We kept them in these tubs which very easily slipped under the bed for storage.

Saturday, January 24, 2009

Fabric Dyeing Day

I dyed fabric all day yesterday, and this morning I started, bright and early, doing it again. I end up taking some good long breaks to rest my feet, which usually drags the day out a little. This is our garage where most of the dyeing process happens. I need three tables to dye comfortably: one to hold "stuff", another clean space to manipulate and fold my fabric, and a third for a workspace.


I started making my dye solution (fabric, not hair) in 1/2 cup increments to avoid waste. Whatever full-strength dye is leftover must be refrigerated in a non-food storage area, so the less I have leftover, the better.

Once the fabric is in the dye, I carry it to the laundry room to sit for some hours before rinsing out the dye. The fabric almost always looks better wet and I try to avoid being disappointed in the finished product (after it's rinsed and dried). Of course, it will look fine, but it won't have the depth of color that the wet fabric has.


The fabric comes out of the dryer a little damp, and if I don't have time to press it right away, I put a sheet over the couch and lay out the fabric pieces to make them flat. They came out of the dryer at 11:30 last night and I was too pooped to stand at the ironing board to press them.

These fabrics are being dyed for my sales booth at the Cotton Patch Quilt Show which is being held in Watkinsville, GA (just south of Athens) March 6-8, 2009.

Tuesday, January 20, 2009

Asian Circle Quilt Class

This blog entry has two purposes: one, to show you the lovely backgrounds the ladies designed in the Asian Circle Quilt class I taught on Saturday, and two, to remind them of the layout they had before pulling it off the design wall in class.

I'm sorry to say that I missed photographing one beautiful black and white background and another lovely layout with Indian fabric as the focal point. When those quilts appear at show-n-tell (I hope!), I'll get photos and post them. Hopefully there weren't any other missed photos.


You all did a great job!

Thursday, January 15, 2009

Cotton Patch QG Program


Tuesday night I gave a short program to the Cotton Patch Quilt Guild in Athens, GA. It was entitled "Preparing Your Quilt for a Show", and was in preparation for our guild show in March. One of the guild members is a certified quilt show judge, so I was a little nervous, but it went well.

The photo is by my friend Frances Arnold.

Musings


It's a cold day in Georgia today, like most of the east coast, so I'm enjoying the sun through the windows as I do paperwork. When the paperwork is done I'll be able to prepare for teaching the Asian Circle Quilt class on Saturday, so I'll have my hands on fabric...always a good thing.

Tuesday, January 13, 2009

Printer Cartridge Bargain


I'm not a huge fan of any particular retail store, but I'm tired of paying high prices for printer cartridges which continually need replacing. I found this bargain at my local Walmart and wanted to pass on the info. to other business-minded quilters... This is the # 02 pack with six (that's right, 6) printer cartridges and 150, 4" x 6" photo sheets for $35.97 !!!!! That's a deal. I hope this info helps someone.

Monday, January 12, 2009

Florida Quilts

While in Florida last week I was able to attend the Killer Bees meeting on Wednesday and the Santa Rosa Quilters Guild on Thursday. Wonderful meetings!

My friend, Betty Brooks, had this quilt with her for show-n-tell. Betty pieces only by hand and did a wonderful job on this quilt...

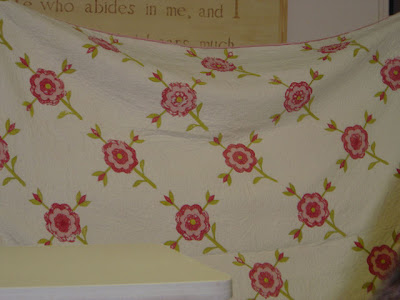
At the guild meeting, the program was a trunk show of inherited quilts that one of the members had. They were all amazing and mostly made by hand. Lovely! Here are three of the treasures...
This next one is called Pickle Dish pattern, and it has incredibly tiny spike pieces...

There were also several Grandmother's Flower Garden quilts...


Wonderful trunk show!